Very important:
Please verify the hardware version of your device. Different hardware versions DON’T share firmware versions. Wrong firmware upgrading may damage your device and void the warranty.


- After you downloaded the firmware from TP-LINK website, please use decompression software such as WinZIP or WinRAR to extract the firmware file to a folder;
- Do NOT upgrade the firmware via wireless connection;
- Do NOT turn off the power or unplug the Ethernet cable during upgrade process;
- Please write down all current settings as a backup and enter them manually after upgrading.
- Internet Explorer (IE) is the recommended web browser to upgrade the firmware.
Firmware Upgrade:
Step 1
Log into the TP-LINK device by typing http://192.168.1.1 orhttp://192.168.0.1or http://tplinklogin.netin the address bar of the web browser (such as Internet Explorer, Firefox). The User Name and Password are both admin in default.

Step 2
Click ## System Tools ->Firmware Upgrade, click the Browse button to choose the firmware you already extracted in the folder.
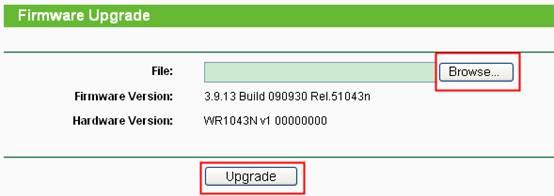
Step 3
Click the ## Upgrade button. The device will reboot automatically. Please wait about 3 minutes.
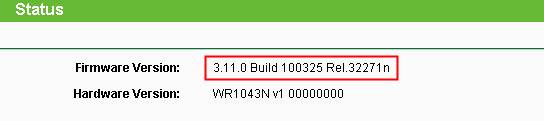
Step 4
Click ## Status, verify that the router’s firmware has been upgraded.
Step 5
In order to make the new functions take effects, it is recommended to restore the device to factory default settings; Click ## System Tools->Factory
Defaults, Click Restore Button.
Step 6
After restoring factory default, please login the web page and re-enter the settings you have written down before upgrading.