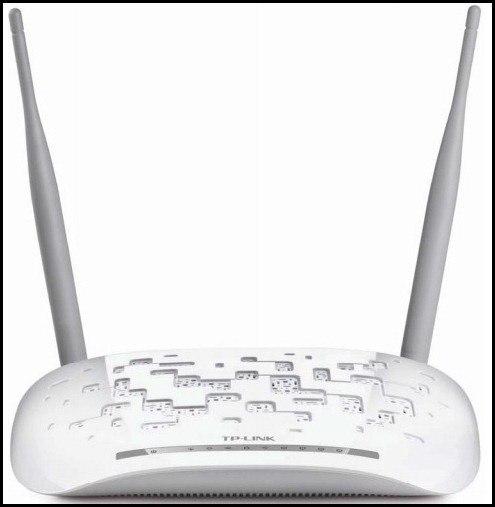
TP Link TD-W8968 300 Mbps Wireless N USB ADSL 2 Modem cum router is one of the best and economical Wireless Routers available in market. The router provides upto 300 Mbps bandwidth with coupled wireless adaptors/devices which supports wireless 802.11n standards. This routers is down compatible with 802.11g and 802.11b products.
This Router has one USB port, Four Ethernet ports and one RJ11 ADSL port. You will get a maximum download speed of 24 Mbps and Upload bandwidth of 3.5 Mbps. The notable feature is that you can flexibly restrict the bandwidth of every users separately. This feature is normally not available in normal ADSL Modem cum routers. Other standard features include inbuilt firewall, inbuilt DHCP server, state of the art wireless encryption technology, Multiple PVCs, Virtual server, DMZ host, IP Address Mapping etc
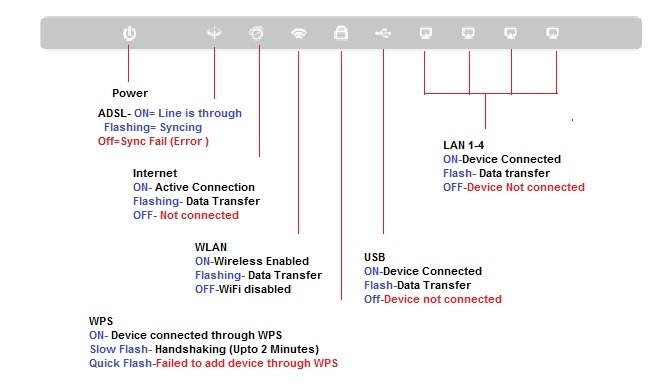
Front Panel LED status indications
TP Link TD-W8968 has Ten LED status indicators. Through this indicates you can see the status of Link, Connections, WiFi and internet connectivity .
Wiring Diagram
Proper wiring of the router is important for setup, configuration and uninterrupted connectivity. An external ADSL splitter is provided with this router. Your telephone line must be terminated to the ADSL splitter first. Nothing should be connected in this line before splitter. You can connect the parallel telephone instruments to the phone output of the splitter if required. See the connection diagram.

Configuration
After proper wiring and connections, switch ON the modem. Connect the Ethernet port of your PC/Laptop with the supplied RJ-45 LAN cable. Now coming to your computer’s network configuration settings. By default DHCP is enabled in this router and you need not to do anything with your PC network settings. To check the proper connectivity click the start button and type the command “cmd" in search box ( Windows 7). If you are using Windows XP after clicking the start button select the “run" tab and type “cmd". Now the command prompt window will be opened. In that window type ping 192.168.1.1 and press enter. If you are getting the result similar to the screenshot below, it shows your router is properly connected to PC.
If you are getting anything other than this, you have to configure your network adaptor.
Open your browser and type http://192.168.1.1 in the address bar. A popup window will be opened to enter user name and password. Use “admin" in both user id and password fields (small letters). A successful login will display the following basic status page. Select the WAN Settings sub menu by expanding the Network Menu as shown
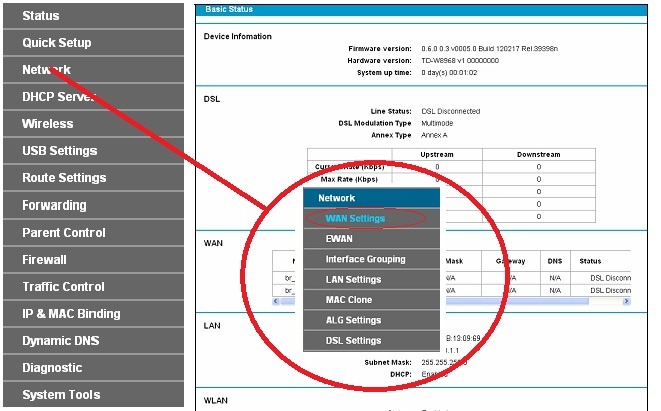
The WAN setting page will display the WAN port information in a Table format as shown.
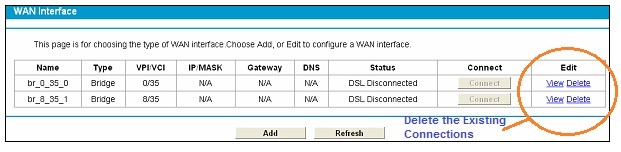
Delete all existing connections and press the ADD button to create an new connection. You will get a screen as shown below. Do the necessary changes as indicated in the image and save the settings
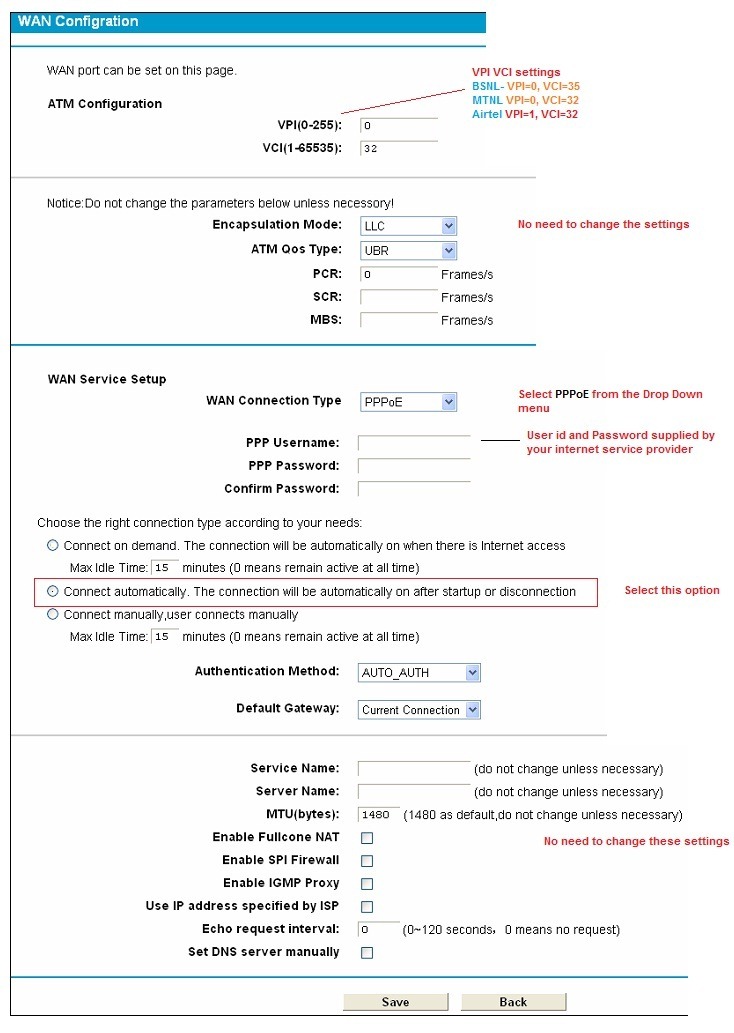
In this page you only need to change Four settings only.
First: Change the VPI/VCI settings as per your ISP. This setting is very much important for internet connectivity. Use the following VPI/VCI settings
BSNL Broadband - 0 and 35
MTNL Broadband - 0 and 32
Airtel Broadband - 1 and 32
Reliance Broadband - 0 and 35
Second: Select “PPPoE" from the drop down menu as WAN Connection Type under WAN service Type section.
Third: Enter the user id and password supplied by your ISP (BSNL, MTNL ). The field is case sensitive.
Fourth: Select the connection type to “Connect Automatically". This will make connection automatically after switching ON the device. Click the save button after completing above mentioned steps. Reboot the modem by clicking the Reboot sub menu under System Tools Menu.