Step 1:
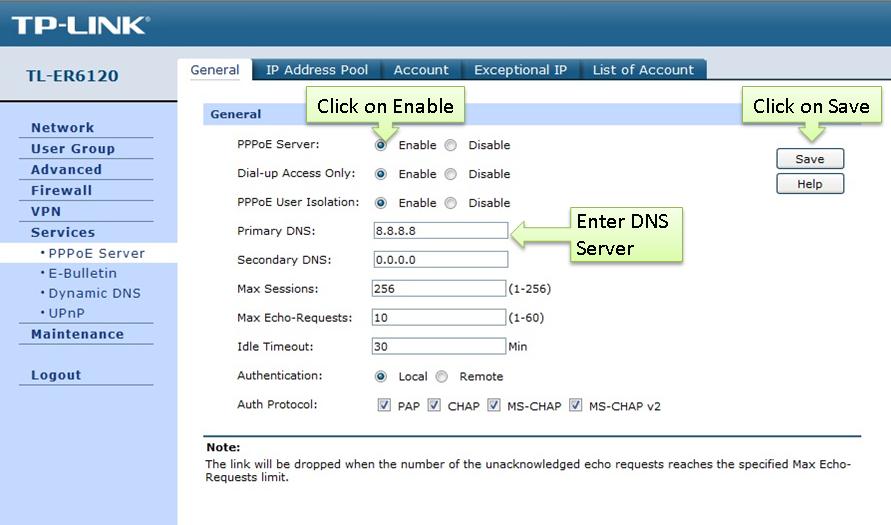
Access the router’s management webpage, go to Services->PPPoE Server.
Step 2:
Enable PPPoE Server, enter"8.8.8.8" for DNS Server in this example.
Step 3:
Look for Authentication, here we selected Local.
Step 4:
Look for Auth Protocol, there are PAP, CHAP, MS-CHAP, MS-CHAP v2, we picked them all in this example.
Step 5:
Click on Save.
NOTE: If Dial-up Access Only is enabled, only the dial-in users can access the Internet; If PPPoE User Isolation is enabled, the dial-in users will be unable to communicate with each other.
Step 6:
Go to IP Address Pool, enter “test" for Pool Name and "172.31.10.10-172.31.10.20" IP Address Range, and then click on Add.
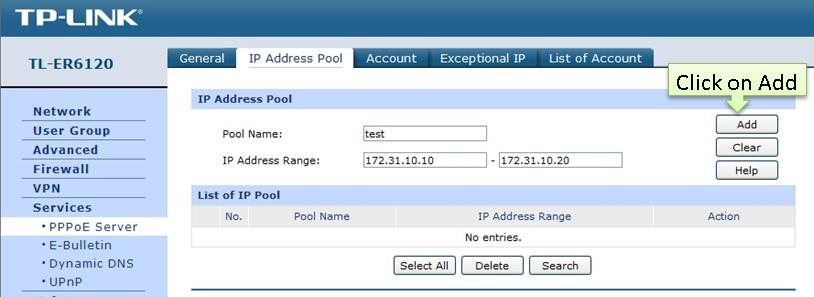
NOTE: IP Address pool must be different range from LAN IP address range.
Step 7:
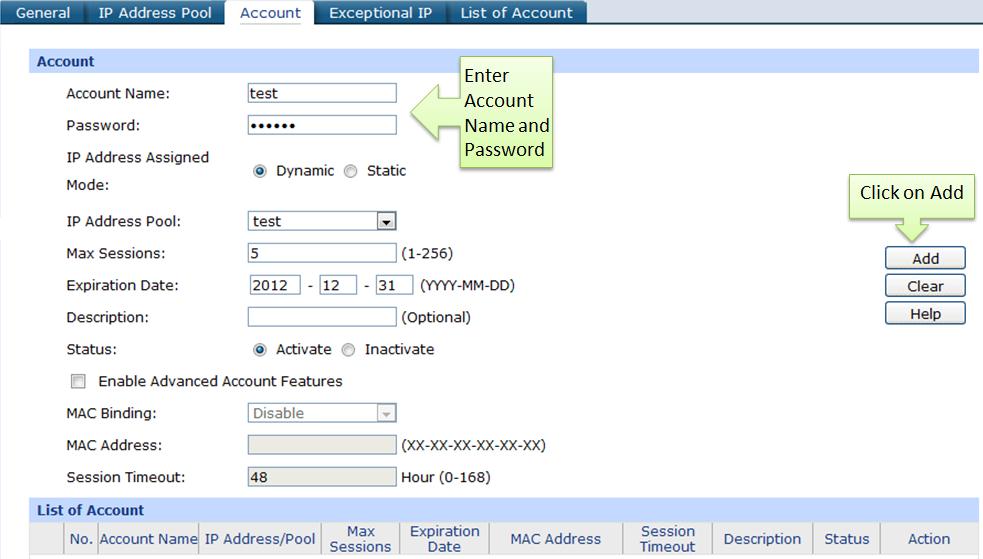
Go to Account, enter Account Name and Password, here we entered “test" for account name and “123456" for password.
Step 8:
Look for IP Address Assigned Mode, select Dynamic, and then select “test" for IP Address Pool.
Step 9:
Under Max Session, enter maximum number of sessions for the client; here we entered “5".
Step 10:
Under Expiration Date, we entered “2012-12-31" in this example.
Step 11:
Look for Status, select Activate.
Step 12:
Click on Add.
NOTE: If you select Enable Advanced Account Features, you can use MAC Binding manually or automatically.
Configuring PPPoE Client on PC (Windows 7)
Step 1:
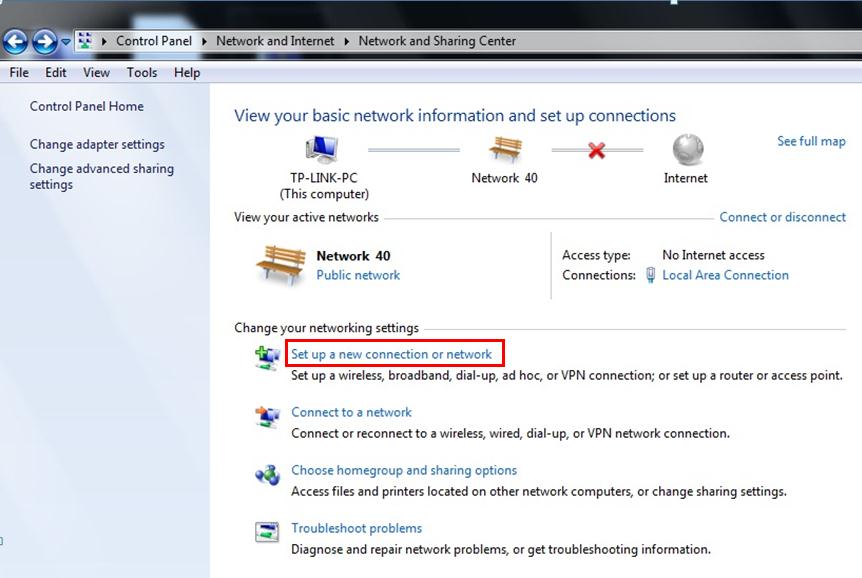
Click on Start->Control Panel->Network and Internet->Network and Sharing Center.
Step 2:
Click on Set up a new connection or network.
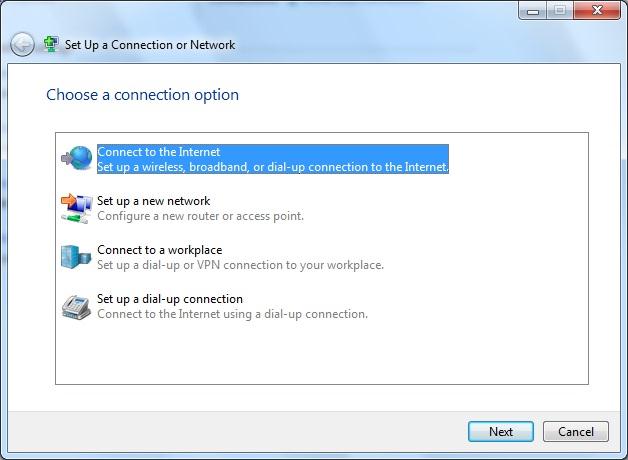
Step 3:
Select Connect to the Internet
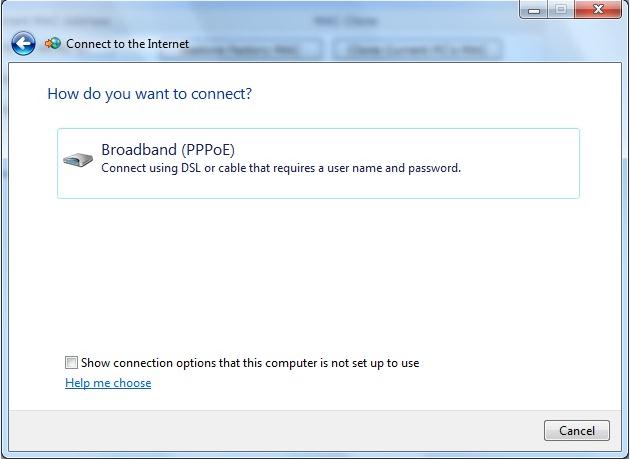
Step 4:
Select Broadband (PPPoE)
Step 5:
Enter “test" for Username and "123456"for Password, and then click on Connect.

Step 6:
the PPPoE Connection is established, you can access the Internet now.

Step 7:
You can view detailed information of account in List of Account.
